Customizing Unifier Print Layouts
CREATING CUSTOM PRINT LAYOUTS FOR UNIFIER FORMS IN MS WORD
As discussed in previous Unifier blog entries, forms, business processes, and external notifications in Unifier can be easily configured to match company standards. For example, the Unifier print feature is fully customizable so that company logos and formatting can be added to maintain branding standards. To demonstrate these print features we will use Microsoft Word to create a custom print layout.
The first step in creating a custom print layout is to export a schema from Unifier for use in Microsoft Word. This XSD file will allow data elements from Unifier to be linked with text in Word, meaning that each time a Unifier form is printed the information will be transferred to the correct location on the MS Word document.
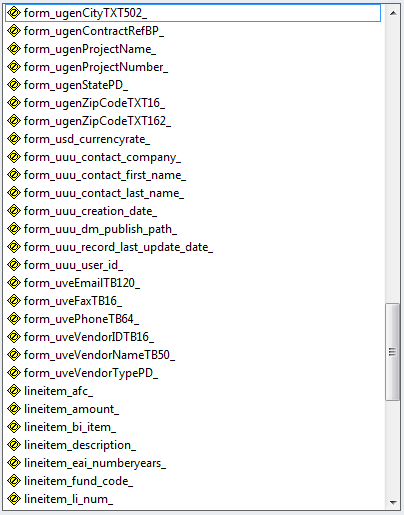
Once the XSD file has been created, it is time to create a MS Word template which will contain all formatting and font styles used for the print layout. This template can also contain company logos, varying fonts and styles, page headers, navigation headers, etc. With the template document formatted, the data elements from the XSD file can be inserted into the Word document. Highlighting words and tagging them with the XML structure window will ensure the text layout of the Unifier print is correct.
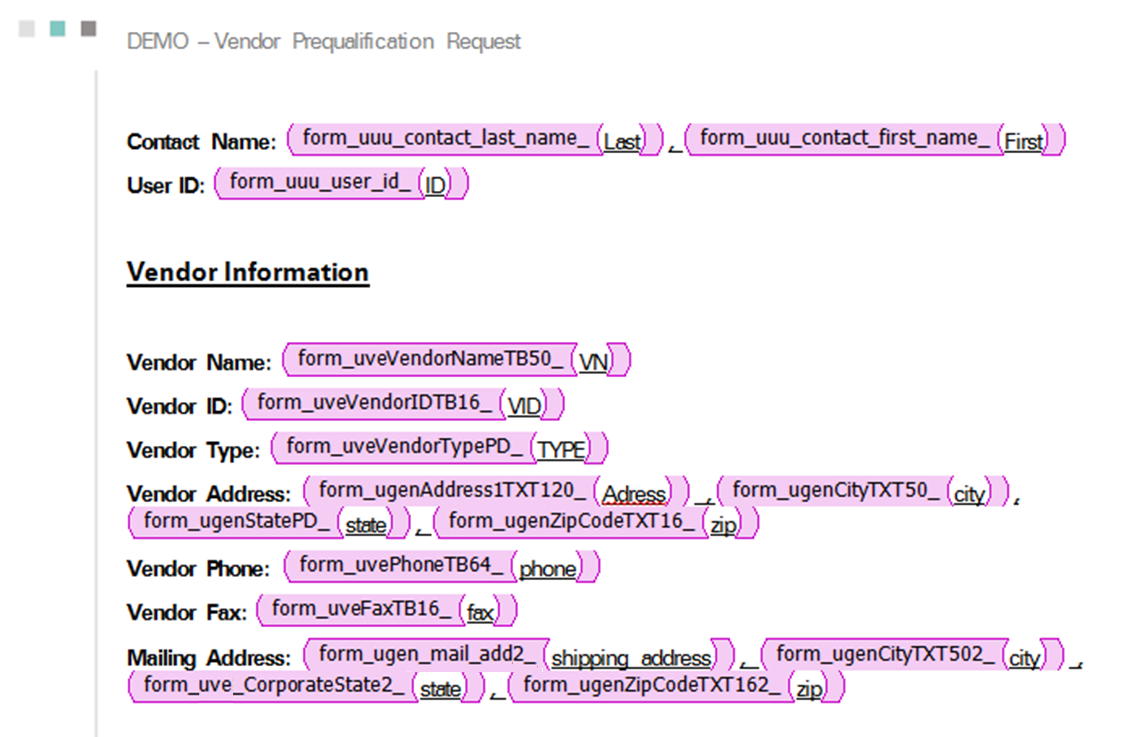
Here, the vendor pre-qualification request fields are linked to placeholders on the Word document. The contact name place holders “Last’ and “First” (separated by a comma) are linked to the data elements from the XML set on the right. Changing the style of the placeholders will change the style of the printout, as shown below with an underline.
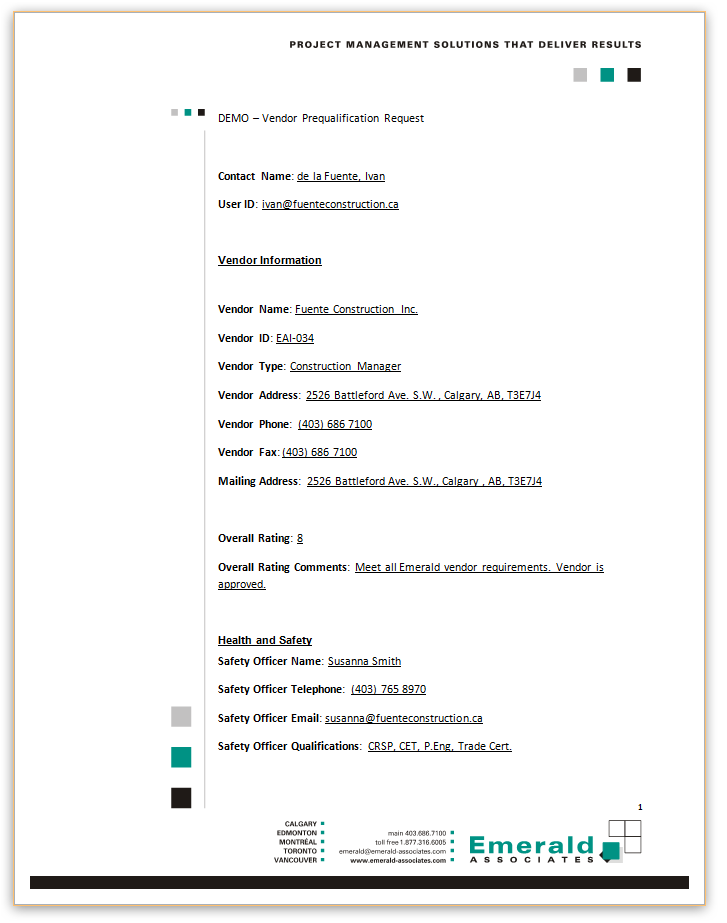
Once the Word document has been created with place holders and data element references, the file can be saved as XML and uploaded into Unifier. The layout will then be available for printing in Unifier, and will generate documents like this:
Customizable print layouts will minimize time in document generation and allow companies to generate standardized documents more efficiently.

Dan MacMillan
Yogesh,
The add-on must be installed and enabled in Word. There is a link to download the client tools after you log in to BI Publisher. If you downloaded and installed it in Word but it's still not working, check to see that it is enabled and authorized.
If you can't get it working you can contact our office to arrange support.
reply
Yogesh Kumar
Hi,
I have to prepare some report in unifier through custom print in word format. I came across your blog and its help as you mentioned save xsd file format and i did same. But when i am trying to open it in word through adds-in it is not opening. could you tell me the process how to open xsd template in word? i am using word 2016.
Please help.
Regards
reply