Customizing Primavera P6 Layouts In Ways You Didn't Know Possible
Create layouts in Primavera P6 and populate columns with data that is normally unavailable
When creating reports using the current layout for the activity table in Primavera P6, we know that layouts can be customized depending on the information we want to display. These types of reports can be modified as they are built; they can be grouped, filtered, sorted and summarized for reporting purposes. You can also view summary information for the displayed columns per your criteria or your specific job requirements. But what happens if we want to merge different information into a single column? Or when we need information in the detail window that is not available as an option to be displayed as a column in our layouts?
Through the learning process there are always requirements that are not as obvious or easily implemented as we may think. For instance, neither relationship type nor lags are available as columns for our layouts. How can we make this process happen and do it in the most efficient way possible?
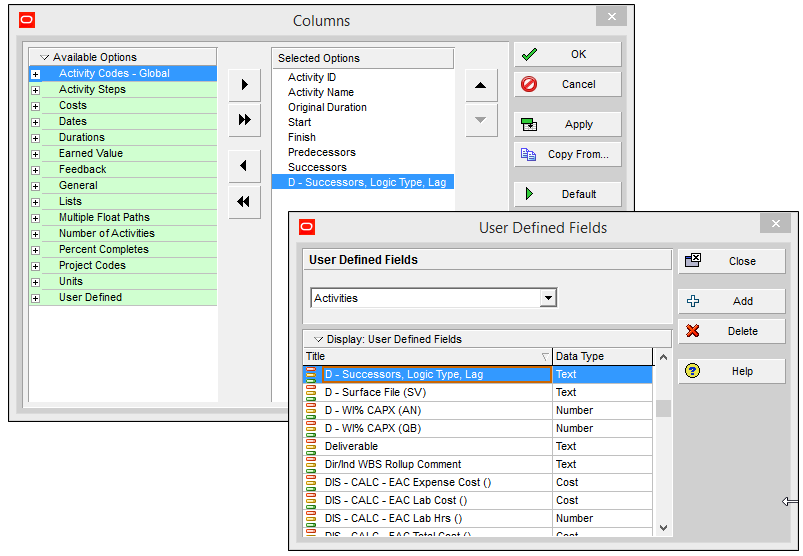
I started by creating a user defined field in Primavera P6 that will concatenate the information on Successor, Logic Type and Lag. Fig.1
Click image to enlarge
Taking advantage of P6-loader, our Primavera P6 add-on tool that provides a secure way to import and export data between Primavera P6 and Microsoft Excel, I started my working process by following these steps:
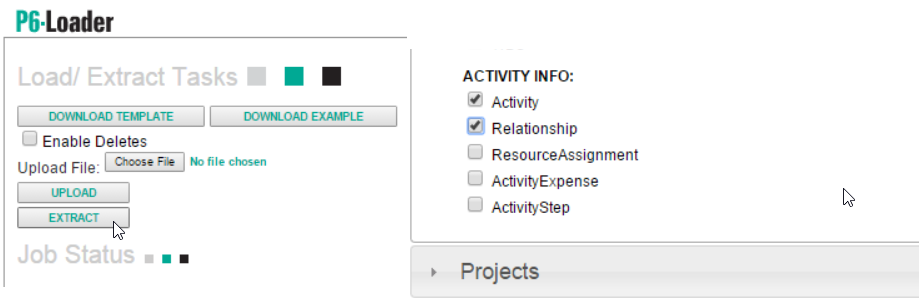
1. I began by extracting information from my P6 project on the Module ACTIVITY INFO. I selected activity and relationship as shown in Fig.2. Once I selected my information and my project, I submitted my request and P6-Loader created an excel file with all of the requested P6 data in a matter of seconds.
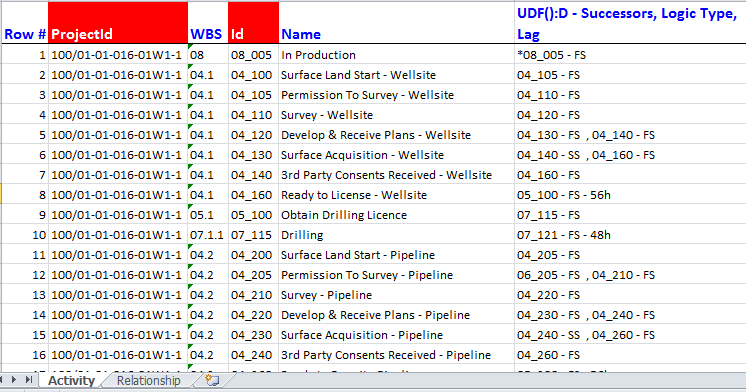
2. I opened the Excel file with my extracted P6 data and made the required changes with the use of formulas and v-lookups. Then saved it. Fig.3
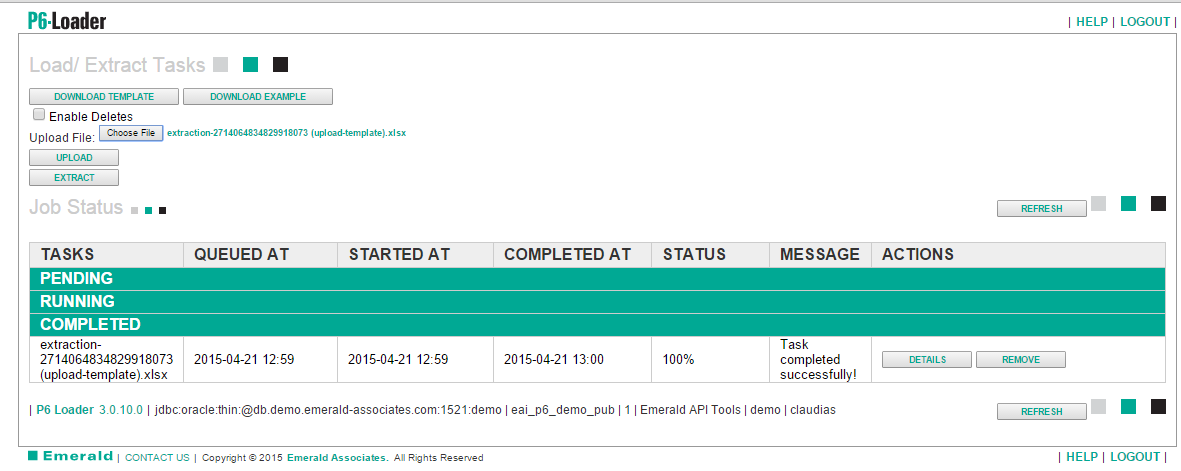
3. Once I had my file ready, the next step was to upload it back into Primavera P6 as demonstrated in Fig.4. The P6-loader will let you know if the task was completed successfully. If the upload is unsuccessful you can check in the details window what went wrong and why. In my case, the upload back into Primavera P6 from Excel was error free.
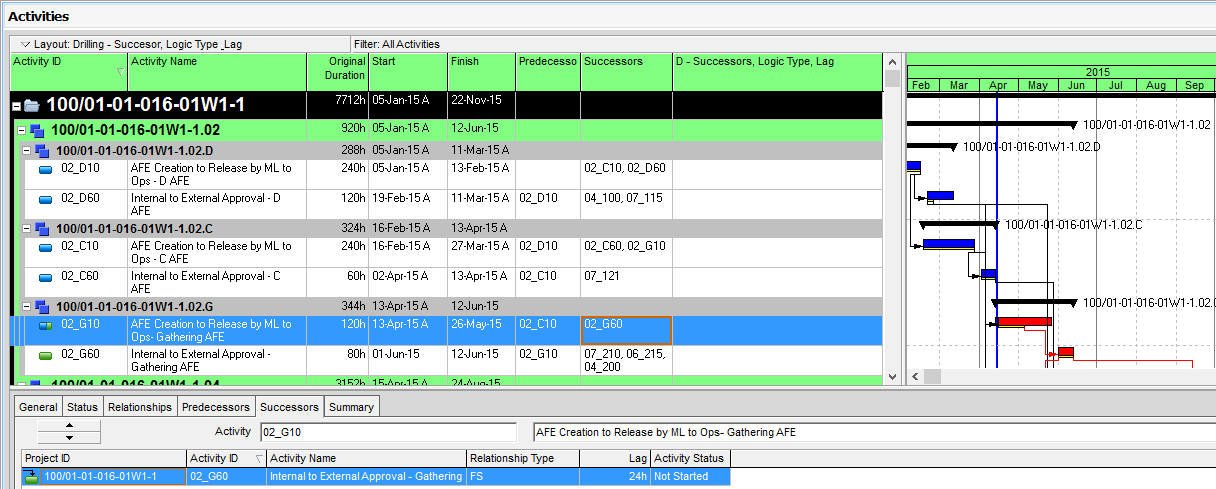
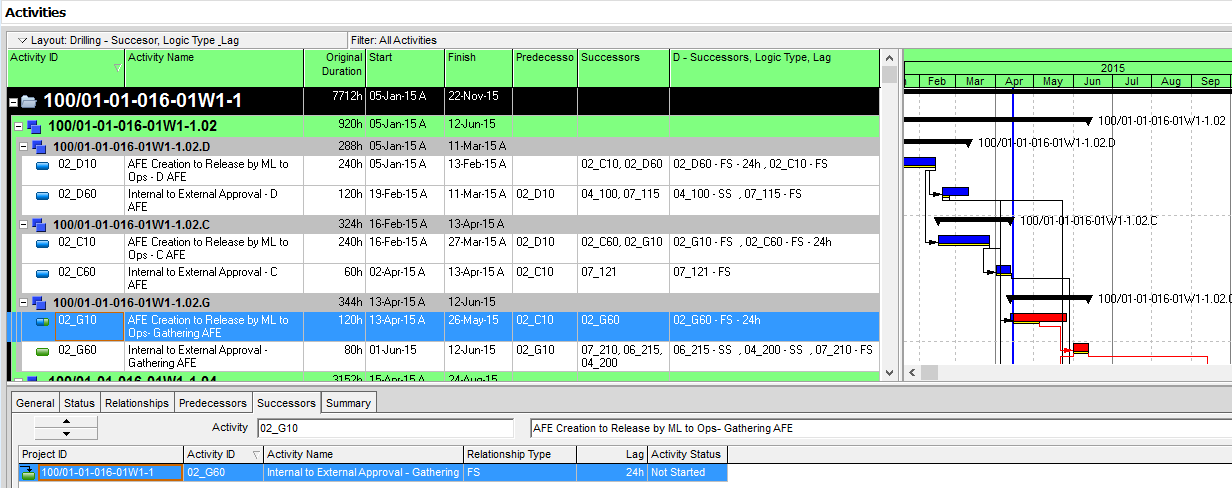
4. Back in Primavera P6 I refreshed (F5) to confirm that my changes were done as expected. Fig.5 & 6
Before
After
As you can see, the P6-loader helped me through a process that I thought could not be done. I was able to manipulate data in ways that are useful for project managers and project teams, while streamlining the process by getting all of the data organized in a timely and efficient manner. I was able to populate the user defined field for a project with approximately 30 activities and 40 relationships in less than 10 minutes.
I encourage you to take a look at our video that will guide you through the steps I have just described. It will give you more detail on how the P6-loader works to streamline processes that you may encounter in your work environment.
