A Step-By-Step Guide to Developing Views in P6 16.1
Working With the New HTML5 Standard View
Adding a new view in either the EPS or Activities screen using the new HTML5 Standard View is identical in both windows, except the options that are available for the Gantt chart.
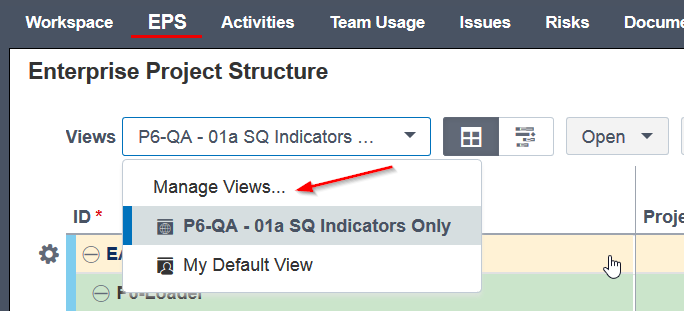
Log in to P6 16.1 Web and navigate to the EPS or Activities screen.
Select Mange Views from the drop down menu in the Views field.
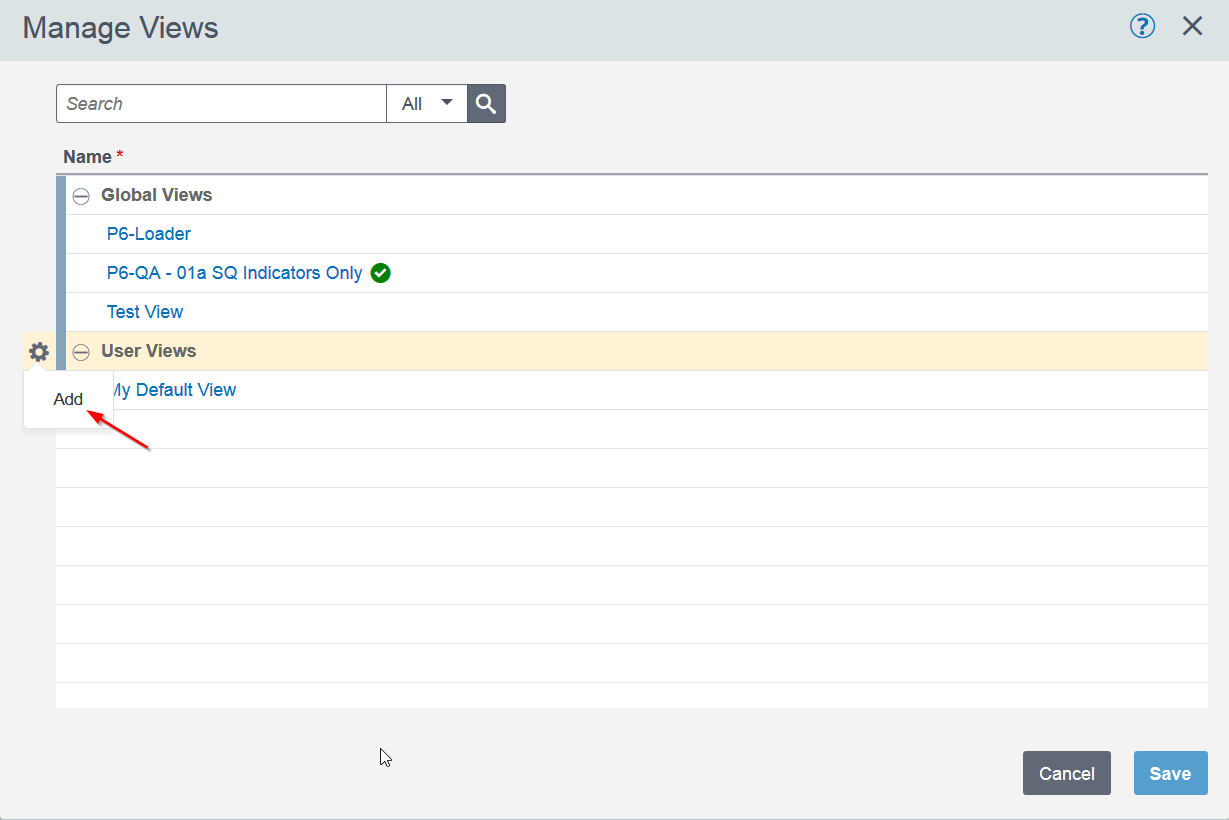
In the Manage View window, click on the gear icon next to the User Views option and select Add.
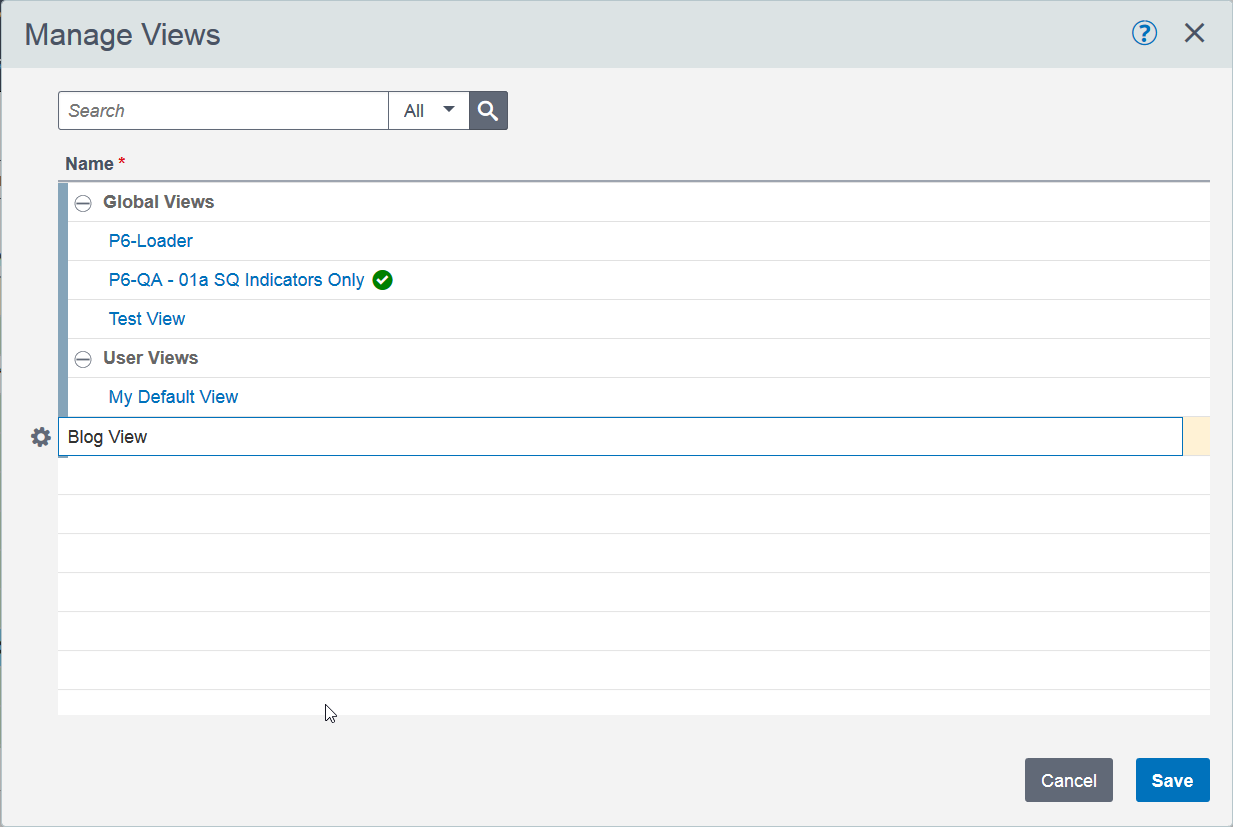
In the field that appears, type in the name of the view being added.
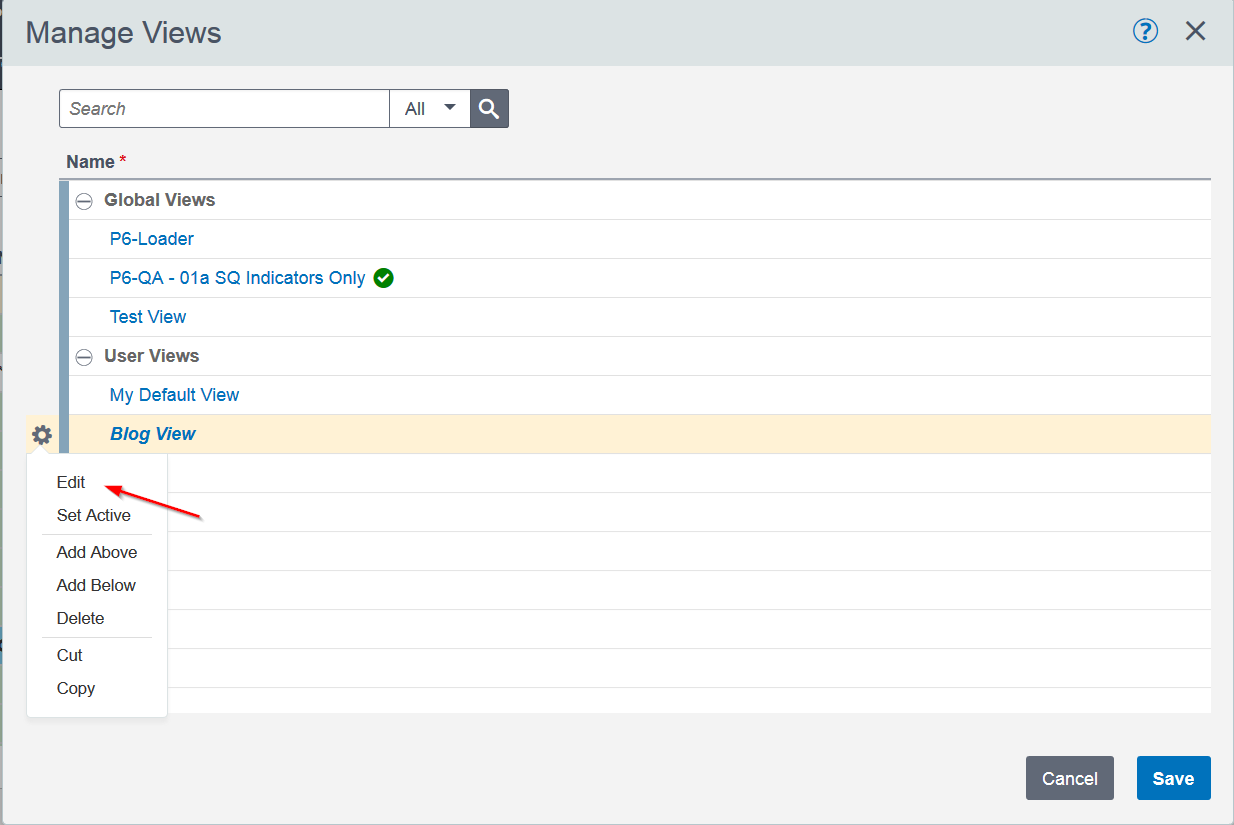
Click on the gear icon next to the new view and select Edit.
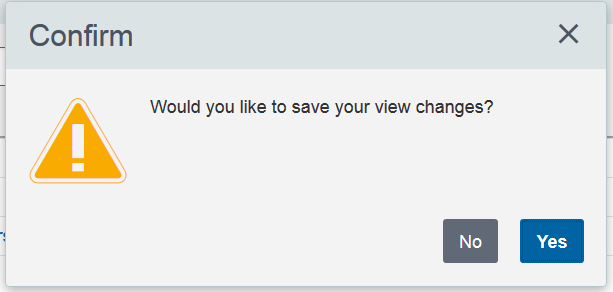
Select Yes when asked to confirm your view changes.
The Customize View window will appear with options listed across the top.
The Columns tab is where the columns to display can be added. Add or remove the desired columns.

Click the Filtering tab and add a check mark to an existing filter to apply the filter to the view. To create a filter or edit an existing filter, click the Edit Filters button.

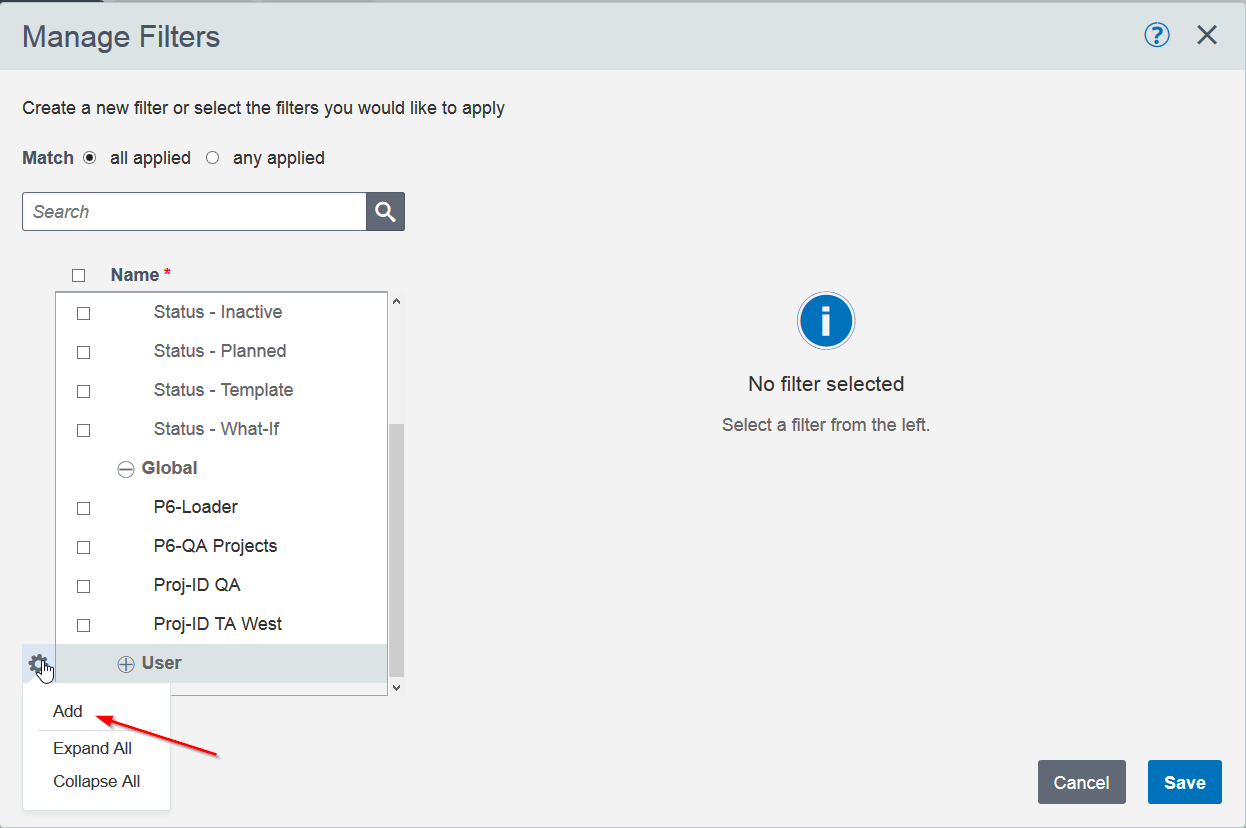
When the Edit Filters button is selected, a "Manage Filters" window will open. Select the gear icon next to the User band and select Add.
Enter the filter name.
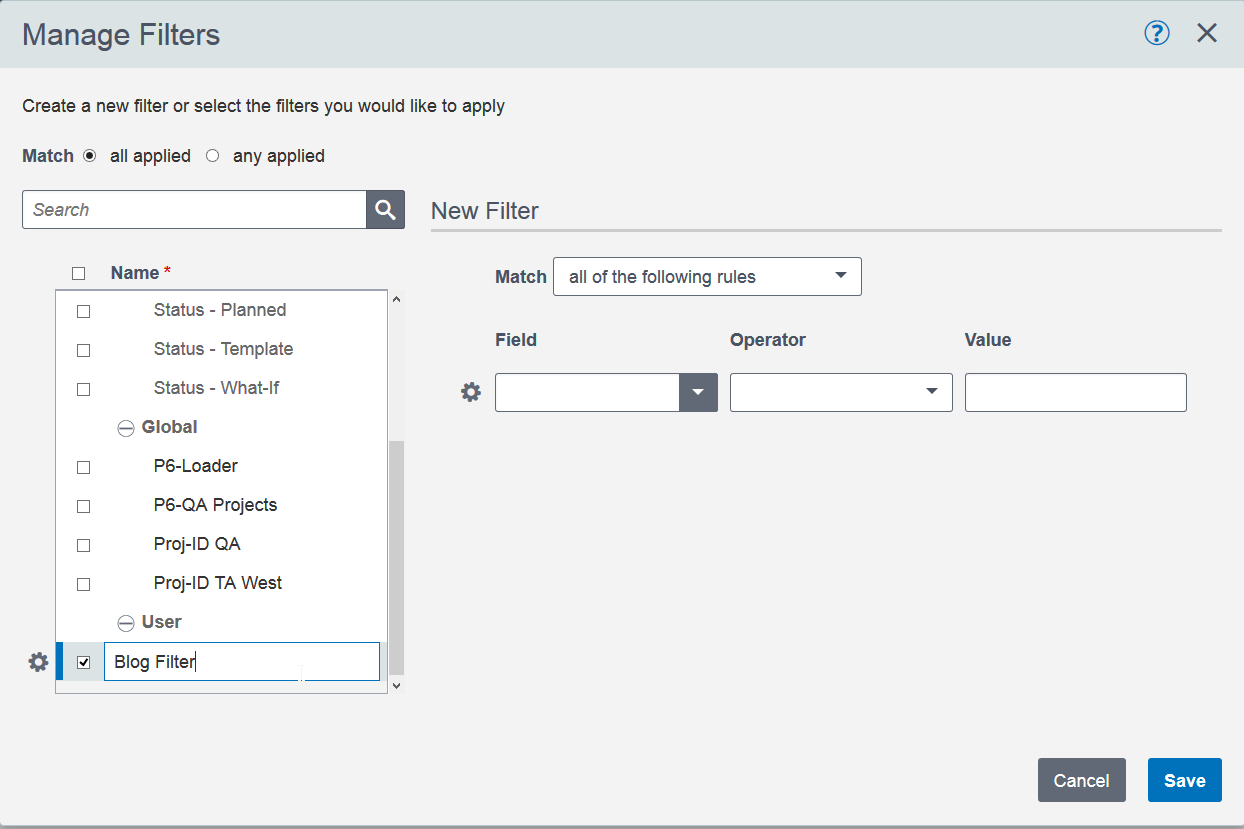
Add the desired criteria in the right portion of the window and select Save.
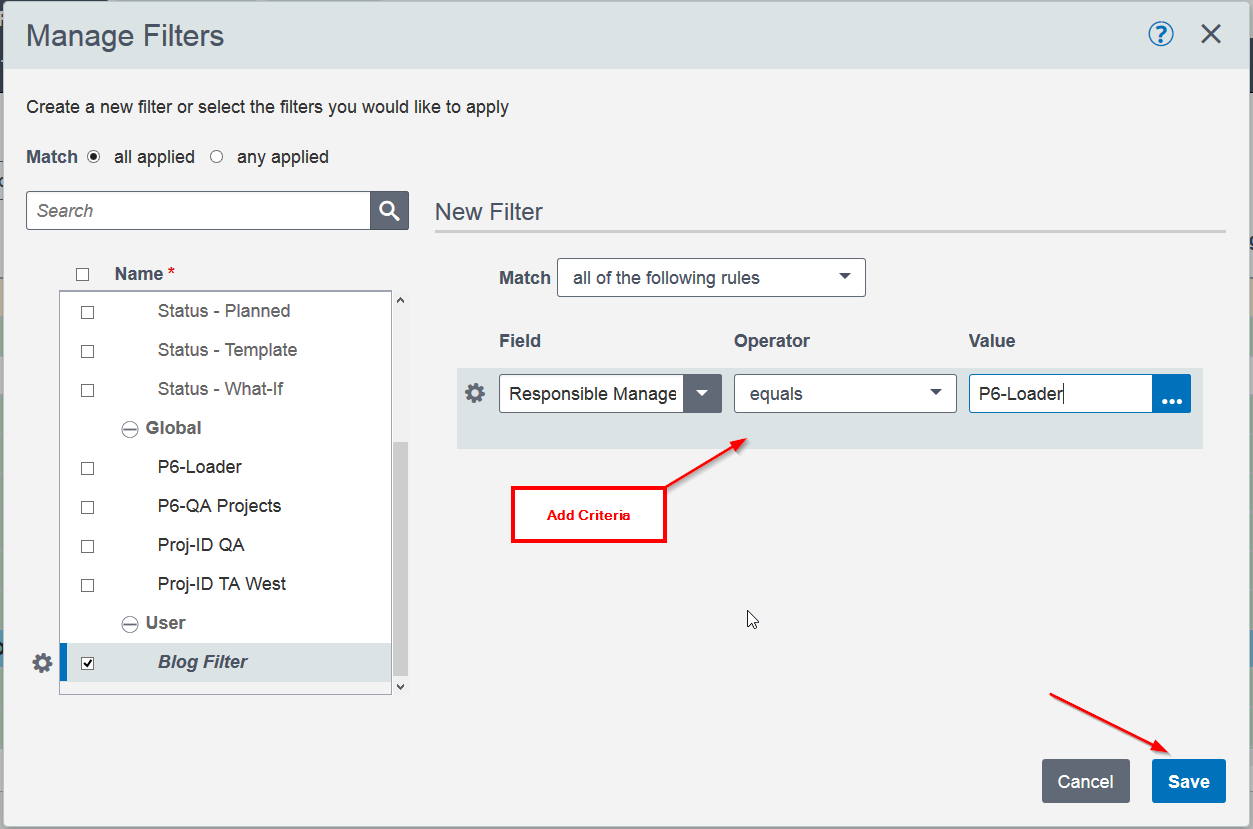
When Save is selected on the Manage Filters window, the window will close. To get back to the Customize View window, select the Customize View icon.

In the Grouping tab on the Configure option, the grouping options can be set.
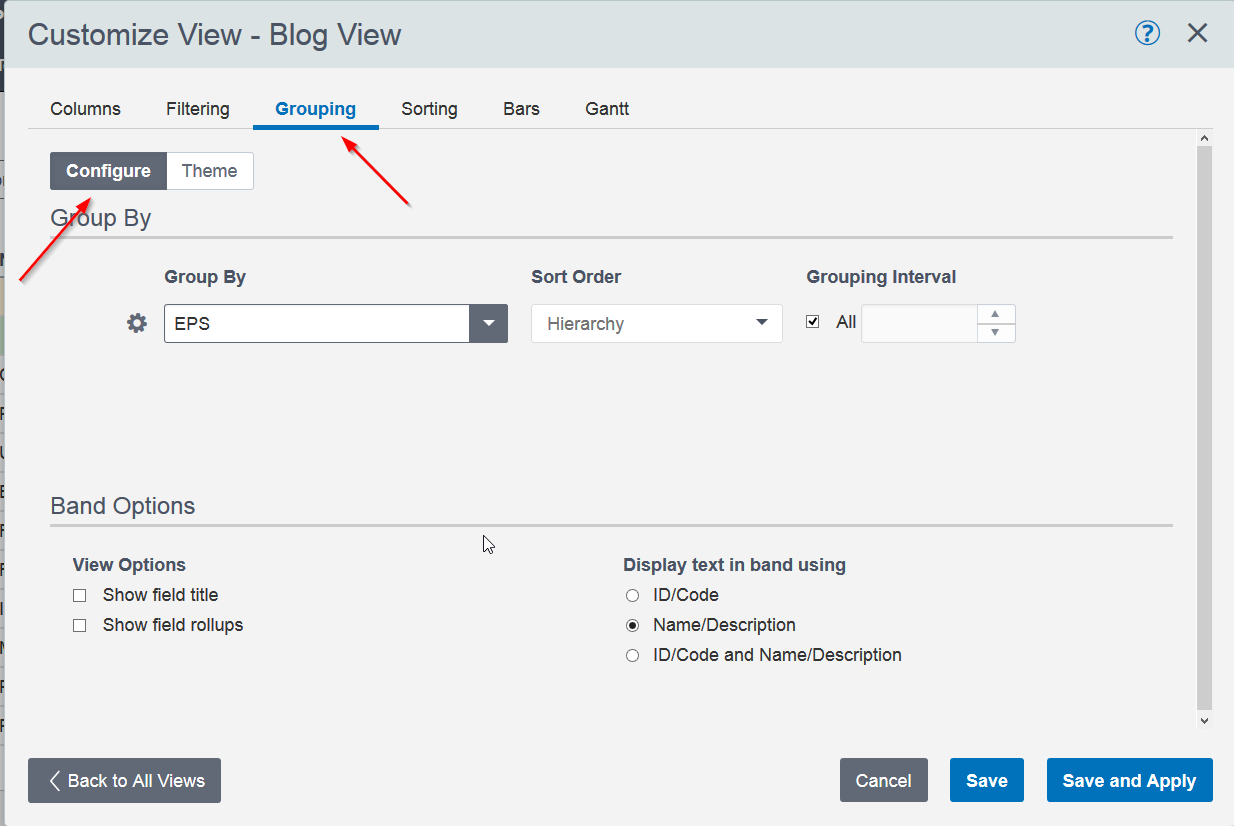
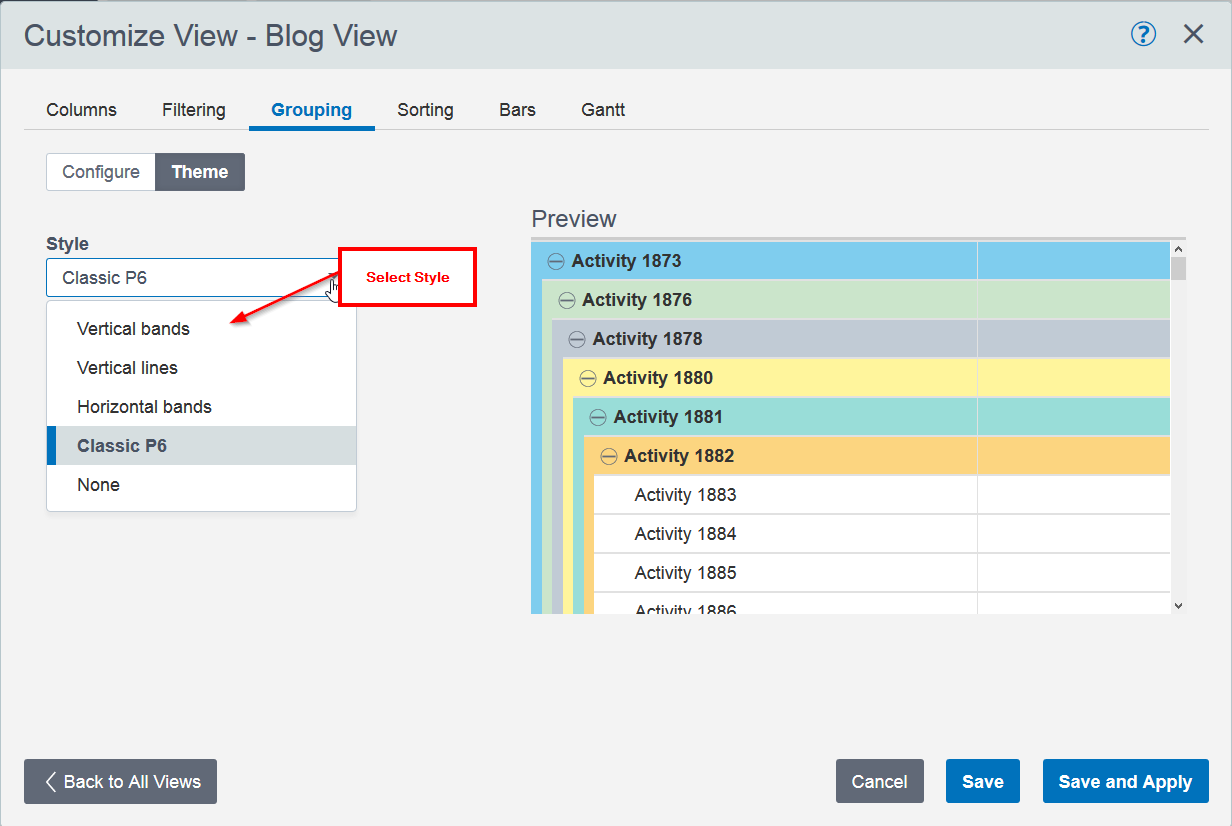
In the Theme option, a style can be selected for your grouping as well as a color theme.

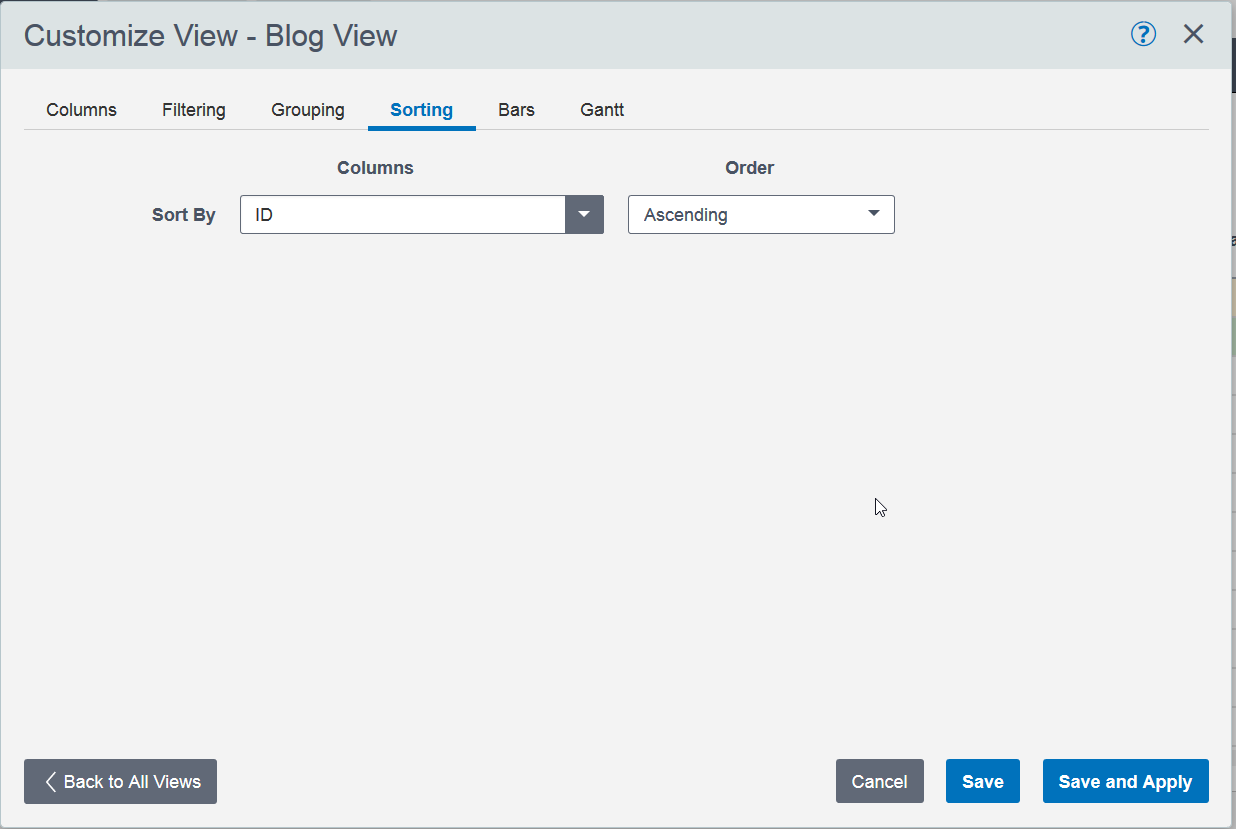
The Sorting tab allows a sorting order to be set based on the columns you have selected for the layout.
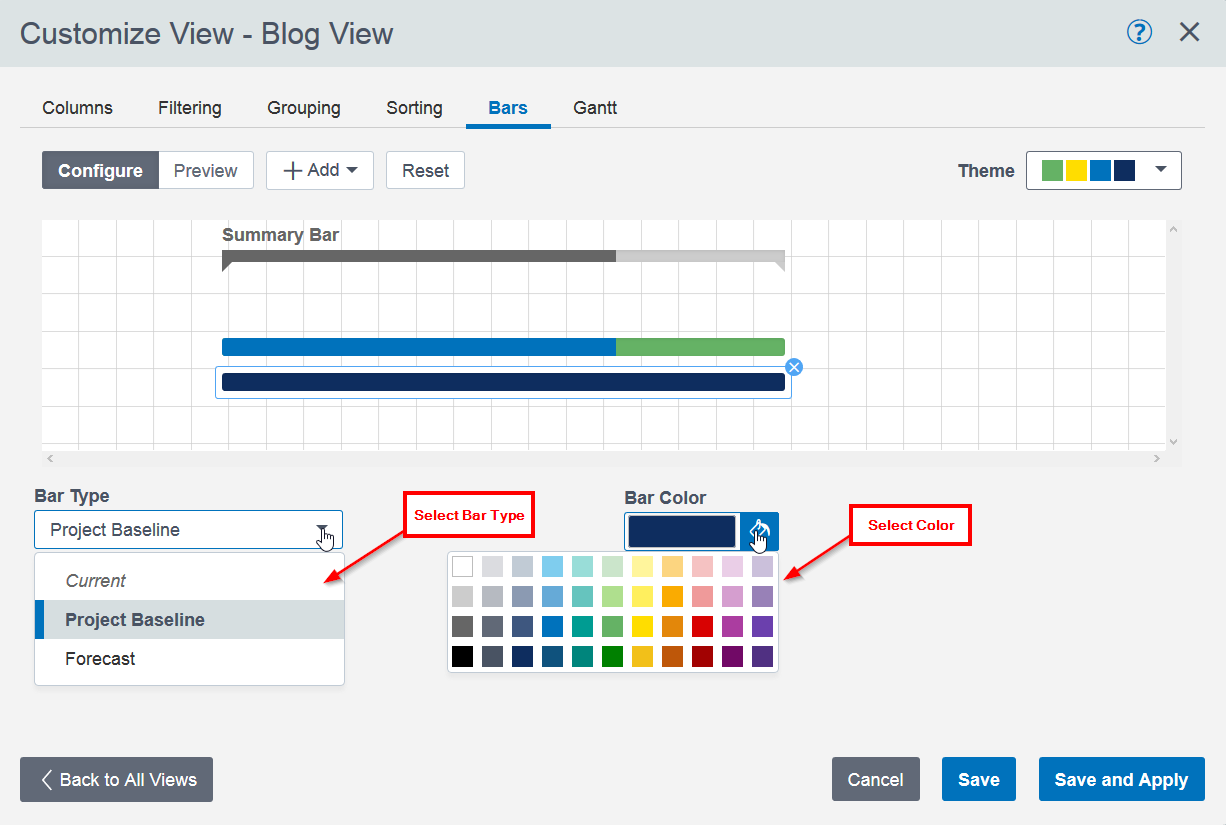
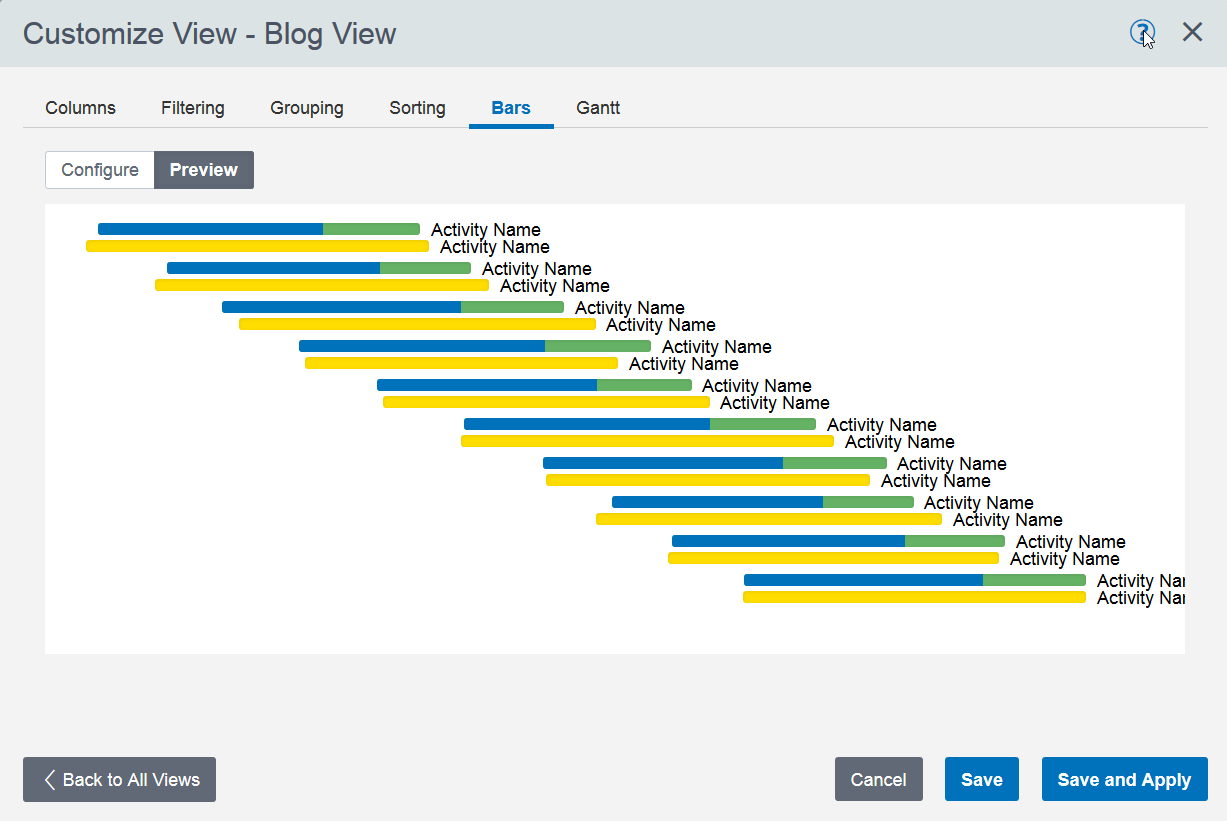
The Bars tab is where the bars and labels for the Gantt chart are set. Select Add to indicate what needs to be added to the layout.
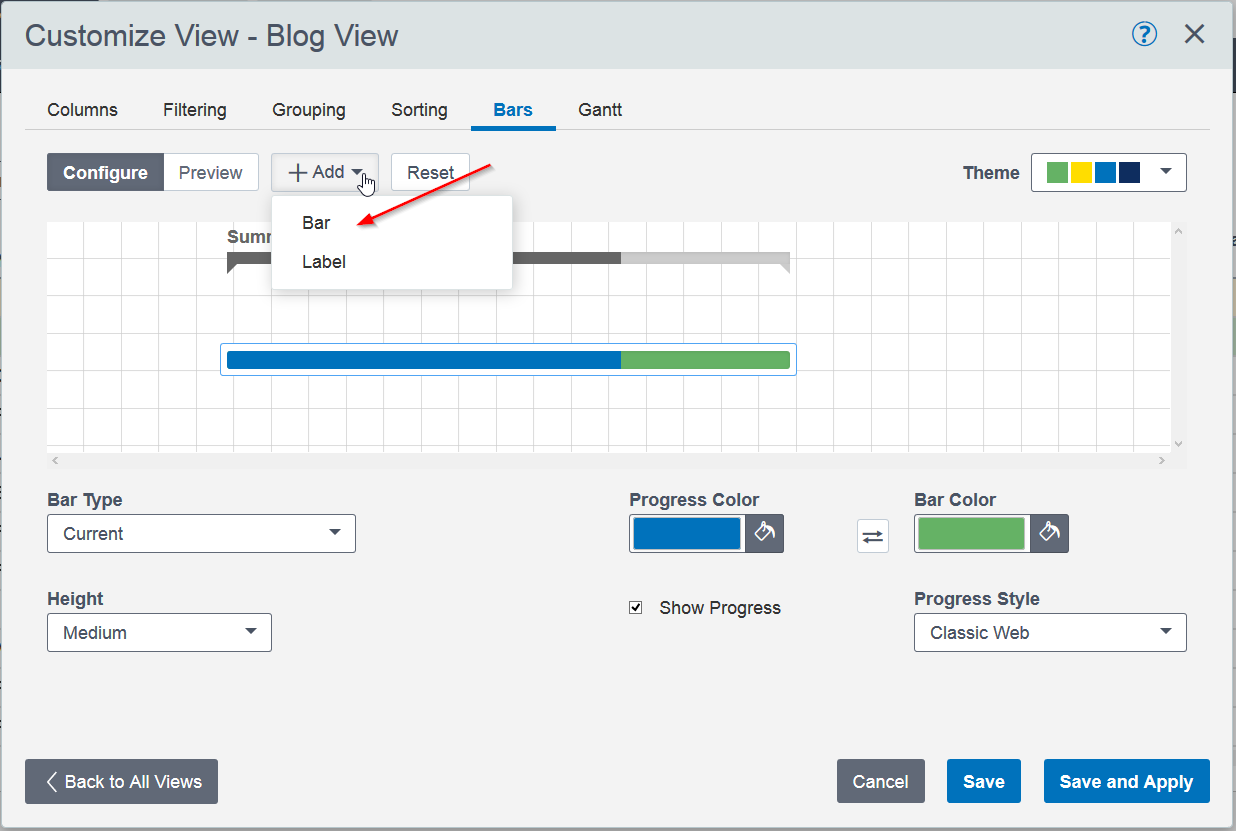
Select the Bar Type to add and the Bar Color to apply to the new bar.
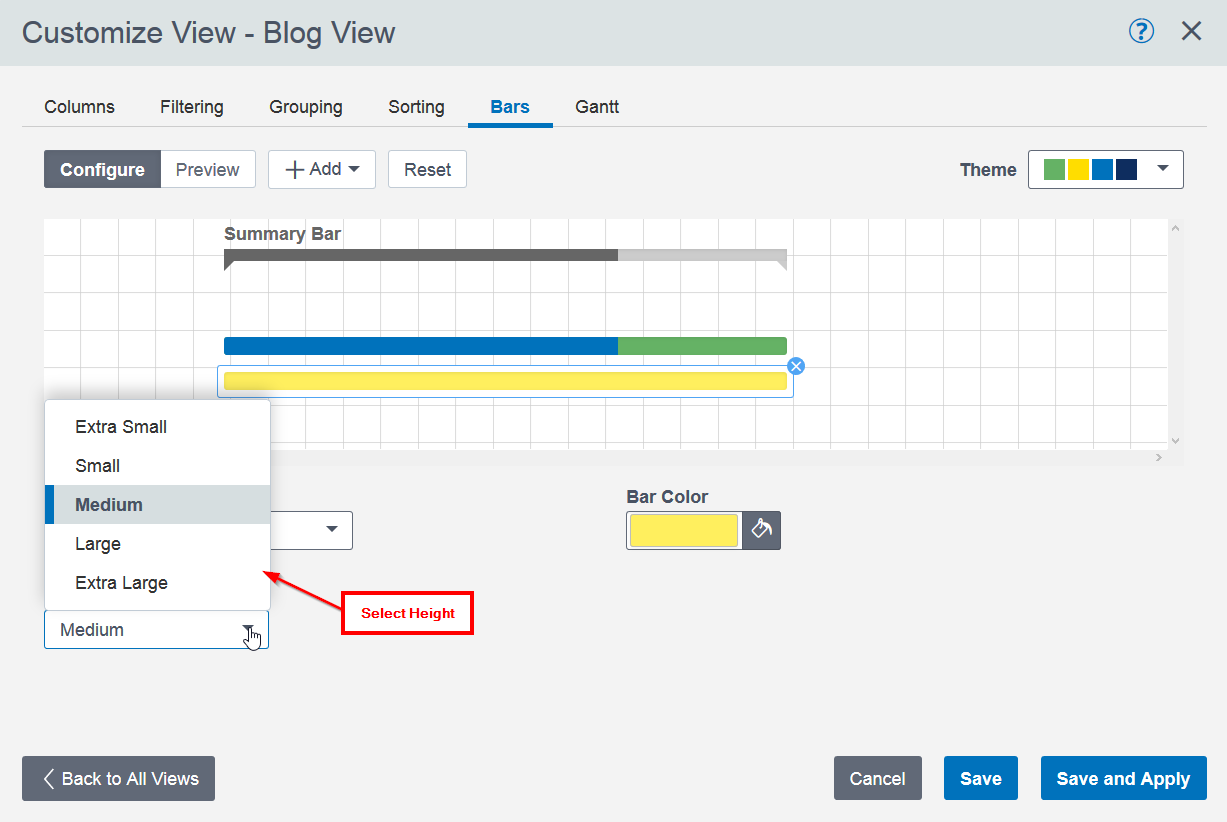
The size of the bar can be selected in the Height Field menu.
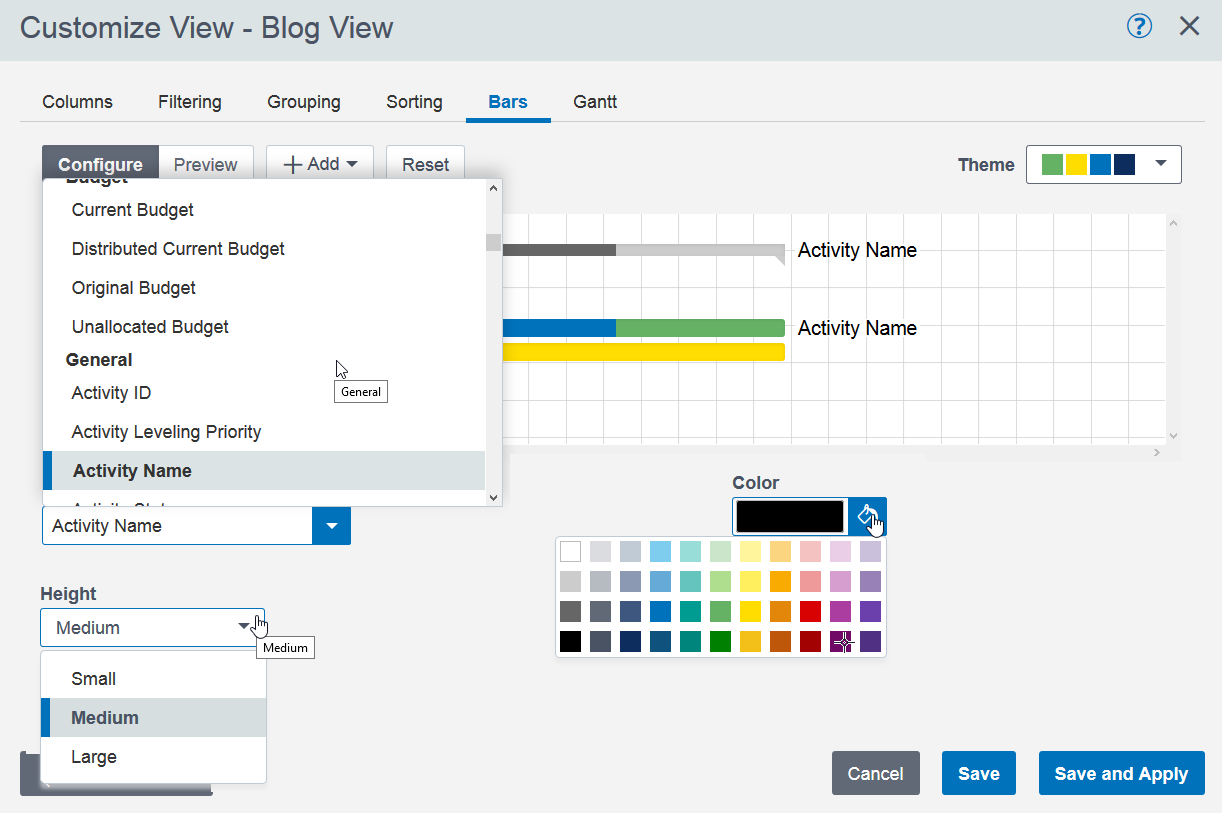
To add a label, select the Label option from the Add button and select the label to add to the layout. Select the label to display, the color and the height for the label.
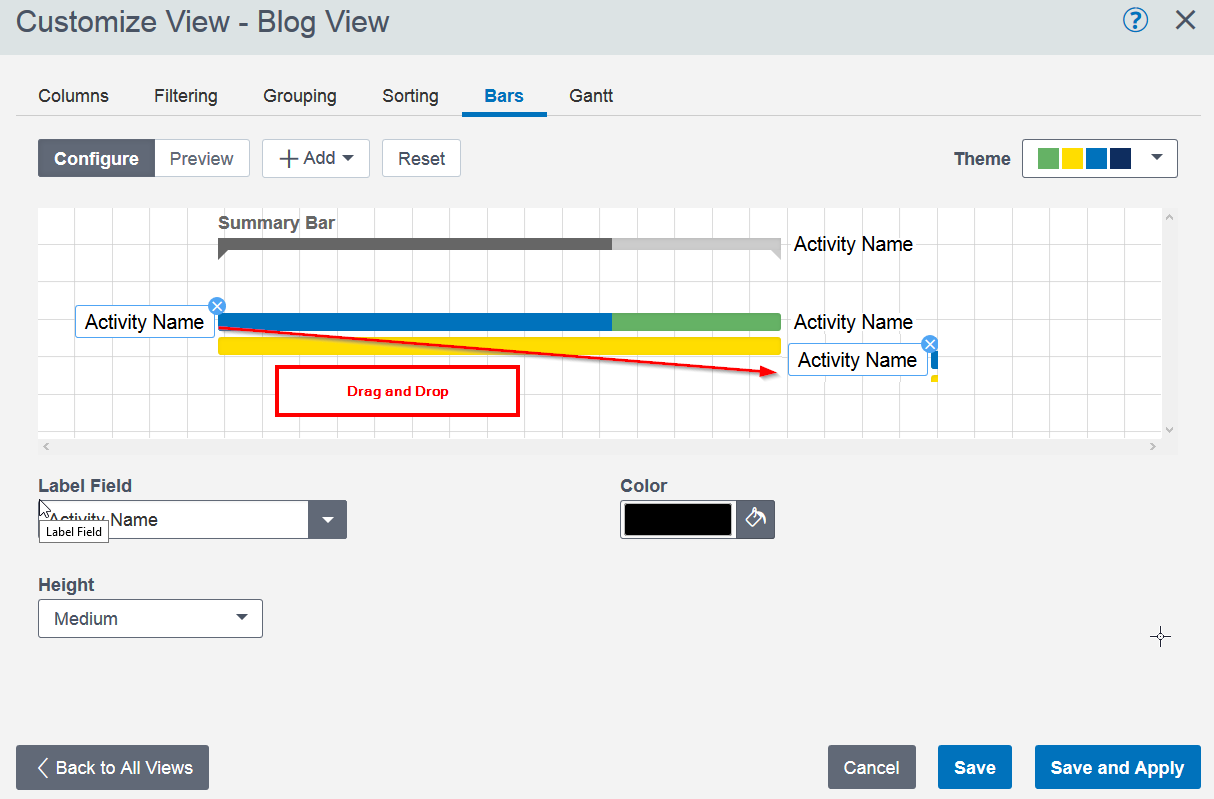
The Label can be moved where desired by using Drag and Drop.
To preview the charts, select the Preview button.
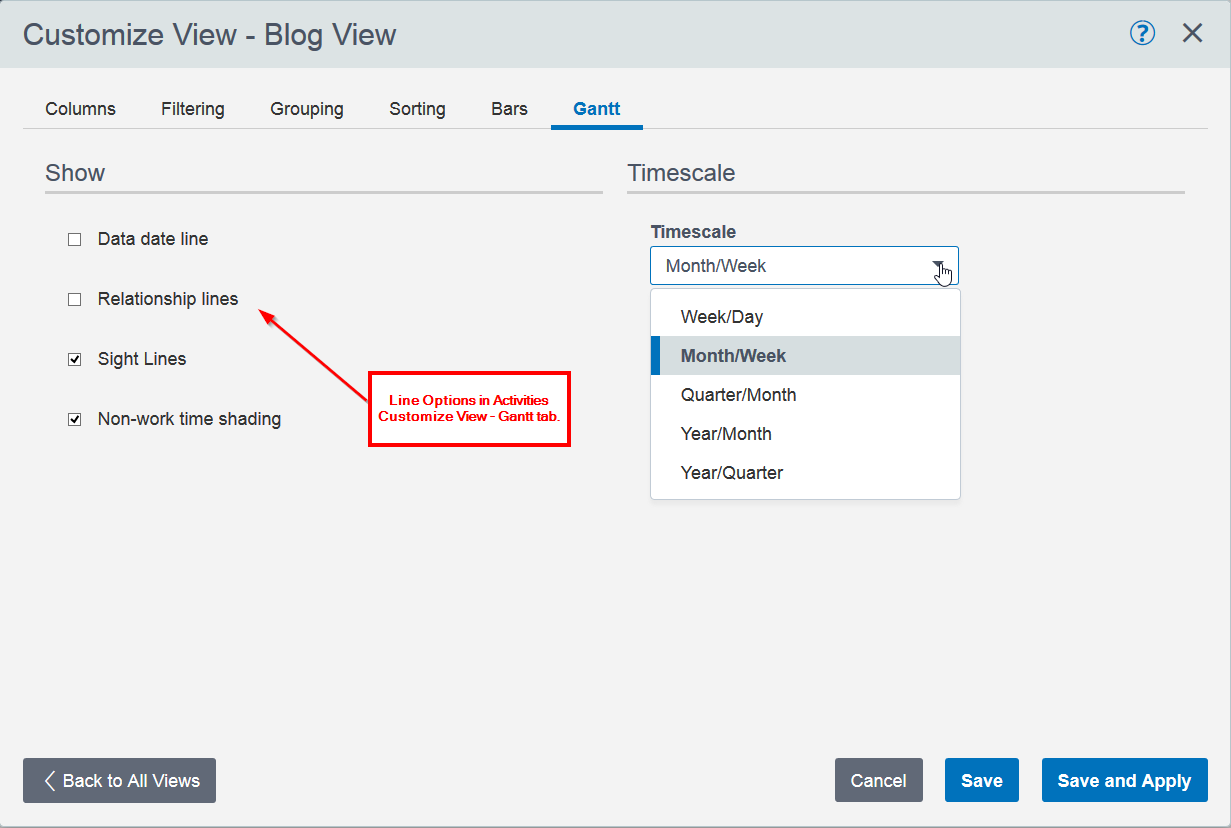
The final step is for the Gantt chart. There are different options on this tab depending on whether you are in the EPS or Activities window.
The EPS window allows the options to show non-work time shading and the timescale for the chart.
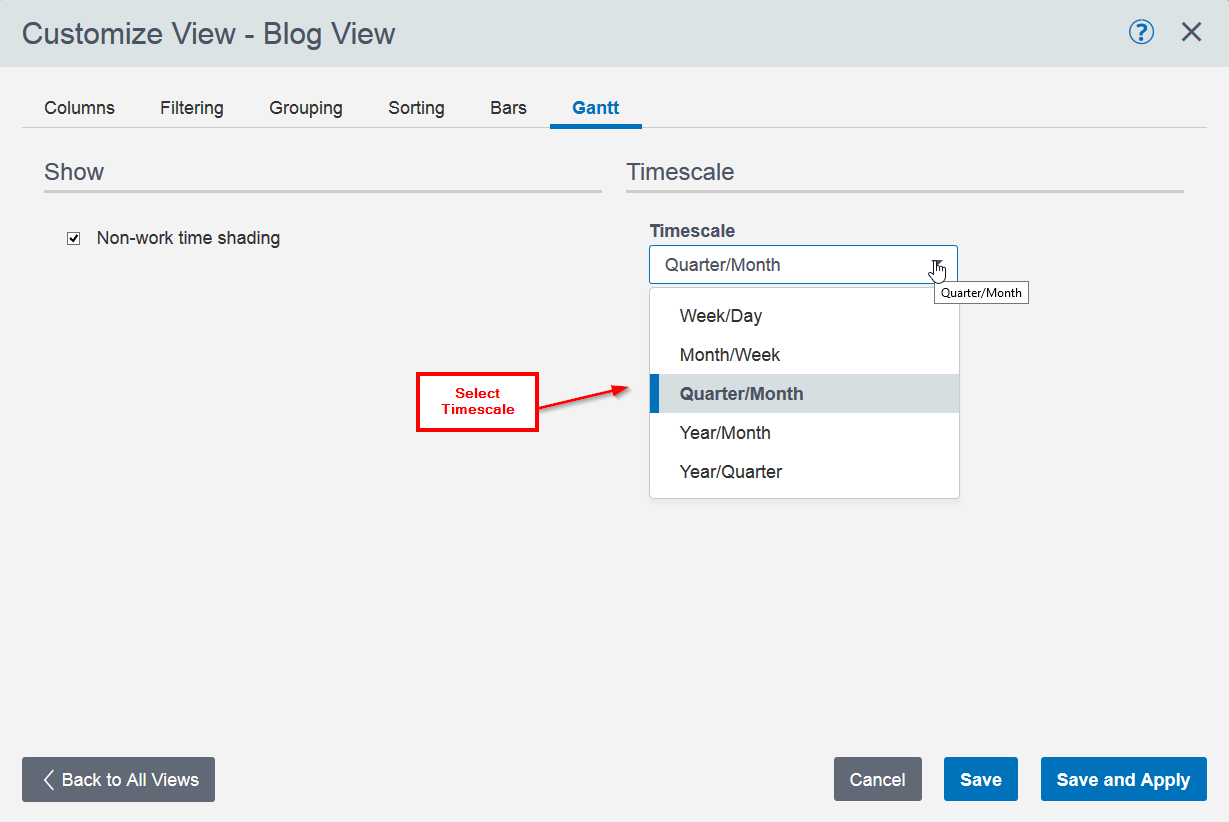
In the Activities Gantt tab there are also options for the lines to be displayed.
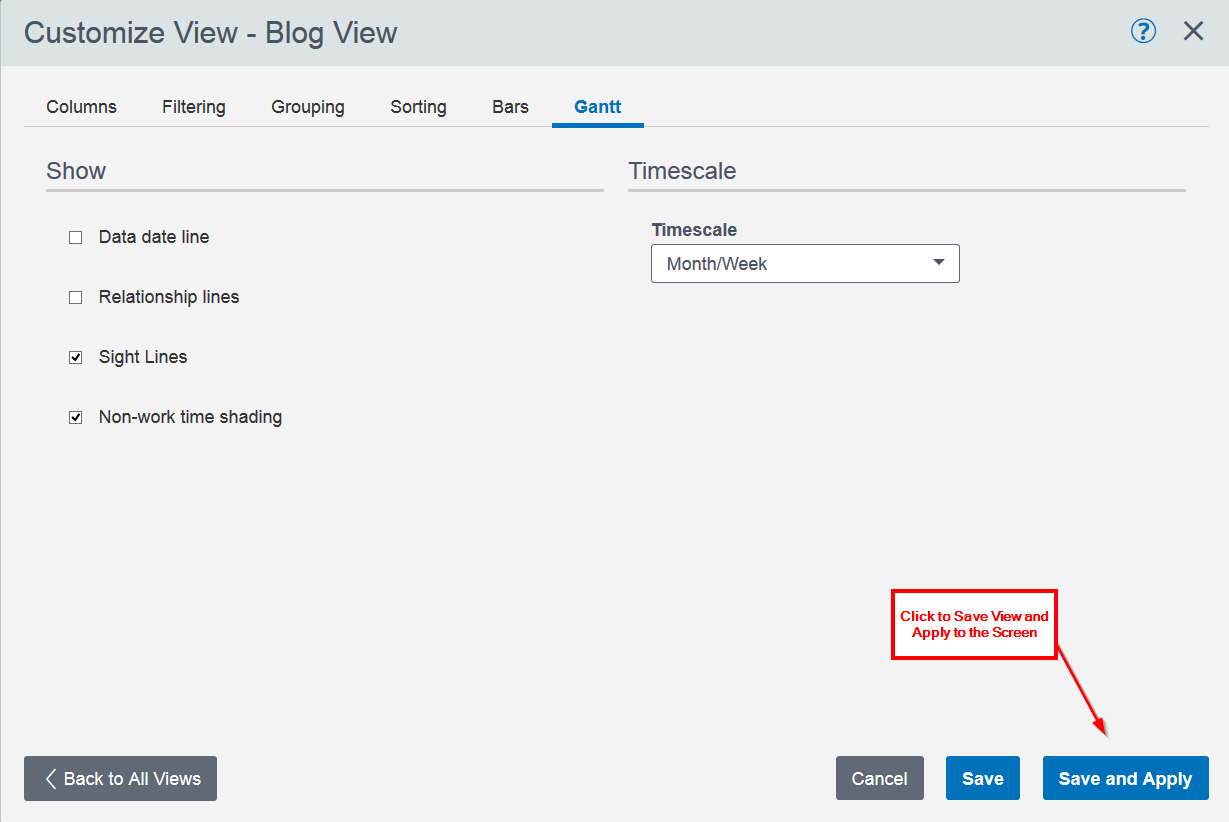
When done with your view settings, select Save and Apply to save your view and apply it to your screen.
About the Author
Sue Fermelia - Implementation Specialist
At Emerald Associates, Sue is an Implementation Specialist and has been successful at drawing on her accounting and project management background to consult with our diverse client base. With her friendly demeanor and strong communication skills, she has become a talented Primavera P6 trainer and works very hard to effectively implement Oracle Primavera solutions that cater to each client’s unique organizational needs.
