The Fastest Way to Create New Users in Primavera P6
A step-by-step guide on how to create new users in P6 using the P6-Loader
The P6-Loader helps streamline and accelerate many processes, one of which is creating new P6 users. The P6-Loader is a flexible and secure solution that allows users with the correct security access on their P6 profile to extract and upload nearly every data element in P6 data. Let’s have a look at how easy it makes creating new P6 users.
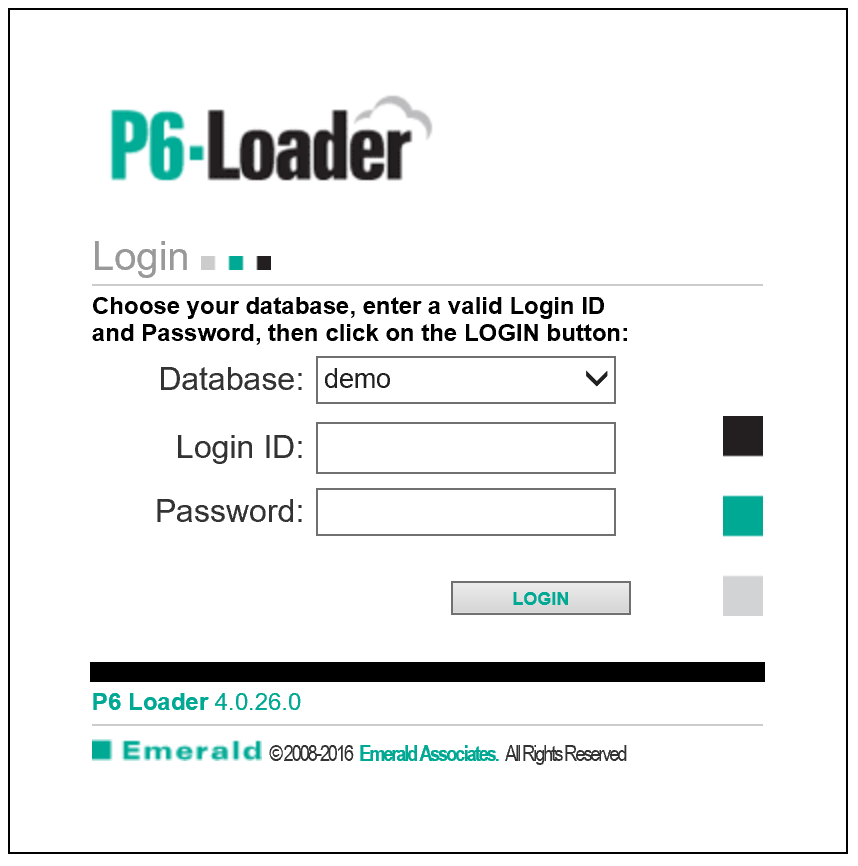
Login to the P6-Loader with your credentials.
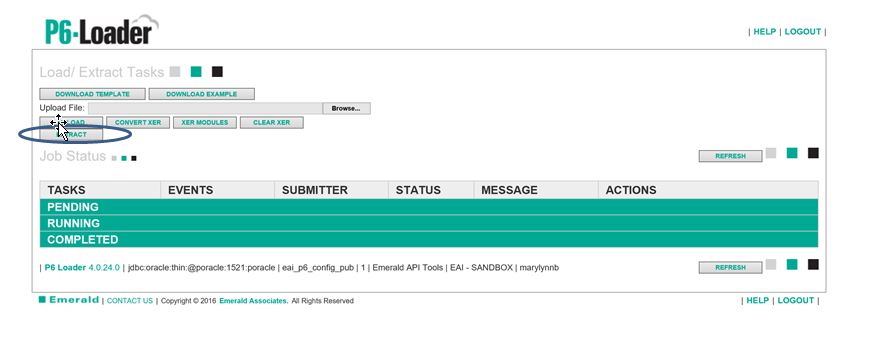
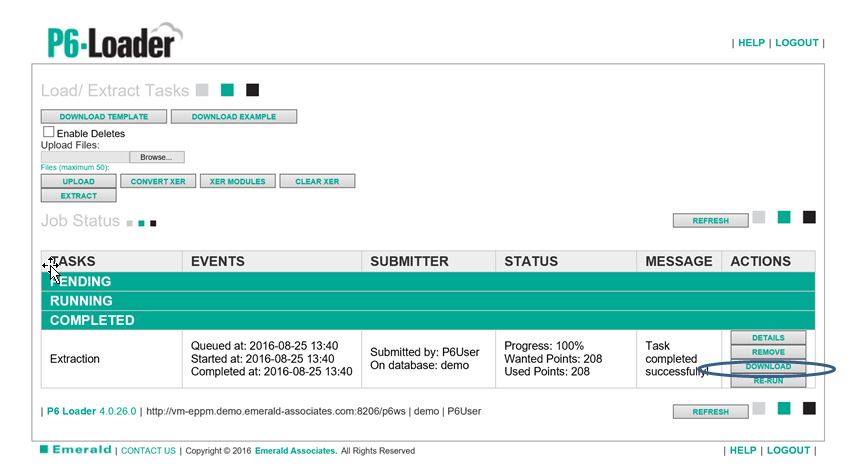
Click extract. We will first extract the user information from the P6 database.
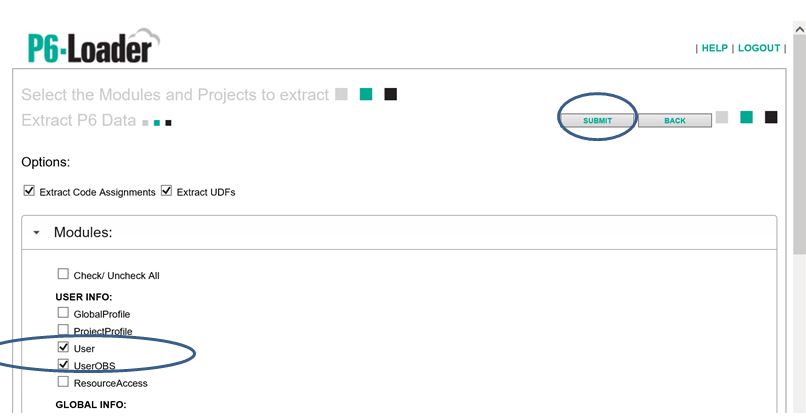
A list of the modules you can extract is displayed (note scroll bar). Click to select the ‘User’ and ‘UserOBS’ modules. Then click ‘Submit’.
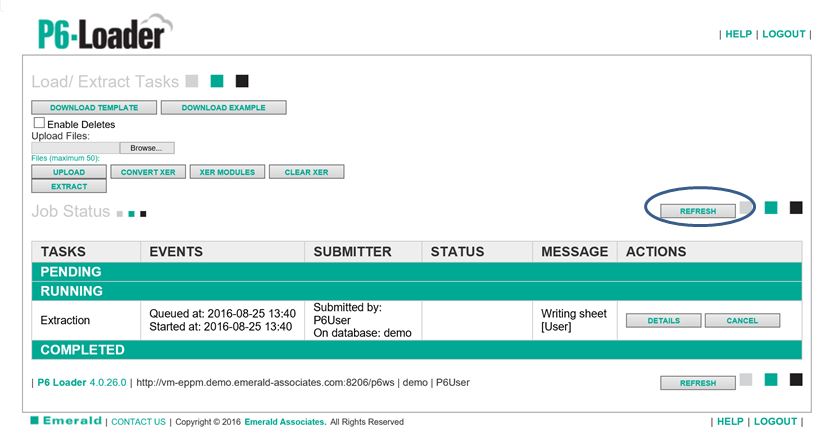
The P6-Loader displays the status of the extracted document – click ‘Refresh’.
The extracted document has been generated – click ‘Download’.
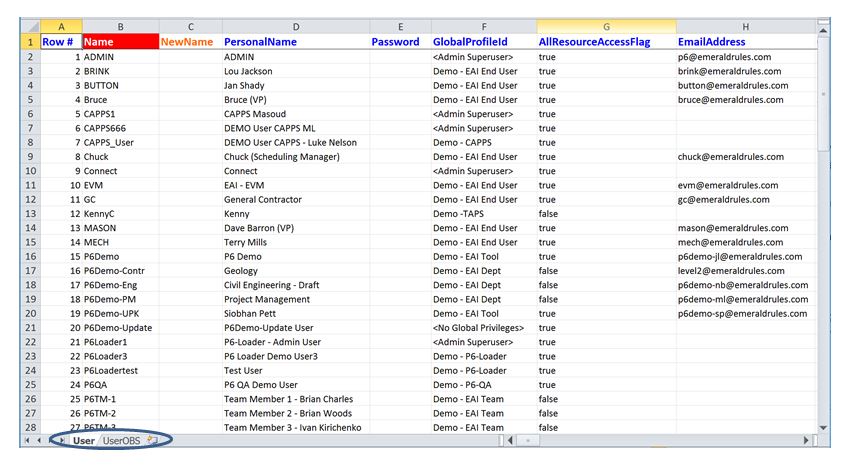
On completion of the download click ‘Open’ to display the spreadsheet information.

The extract shows the Users and the UserOBS settings in spreadsheet format.
This spreadsheet can be used to make changes to existing information or create new users as required. Then upload the additions/changes back in to P6.
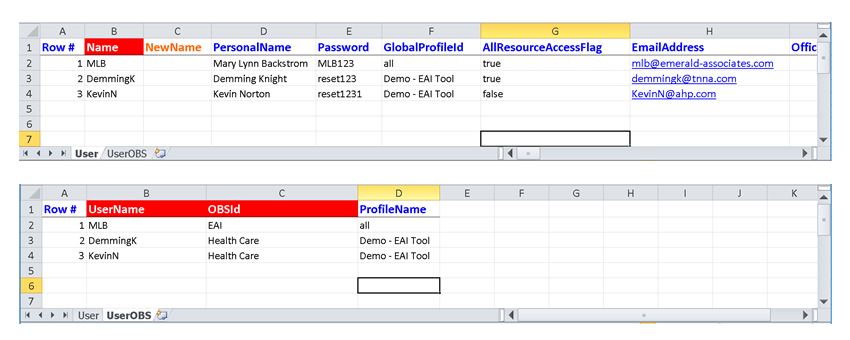
I have had situations where I need to create a number of users, and give groups of the new users exactly the same access as specific existing users.
Existing user information can be easily copied and edited to create the new users, speeding up the process and helping to ensure nothing the new user requires (or does not require) is accidentally missed or overlooked.
Below, the two screen shots are a small example where I have copied security profiles from existing users, then edited that information to create three new users (it could easily have been 300 – don’t forget you can copy/paste some of the change information from other systems, for example electronic request forms, HR systems etc.)
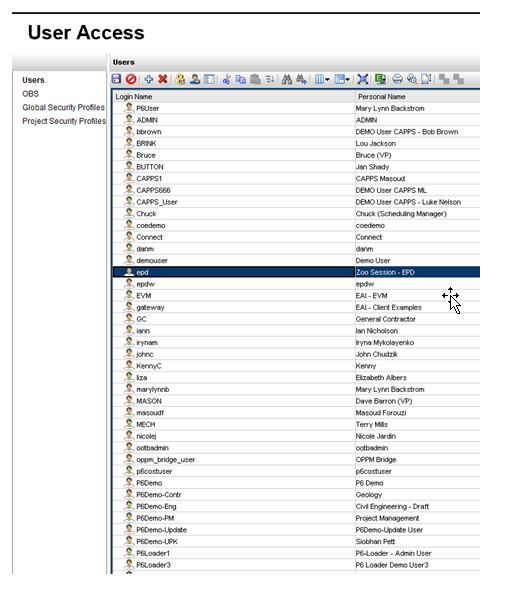
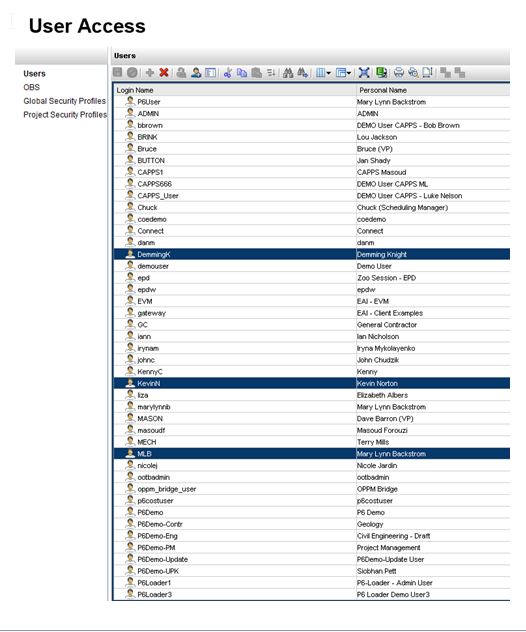
The user list before loading the new users to P6.
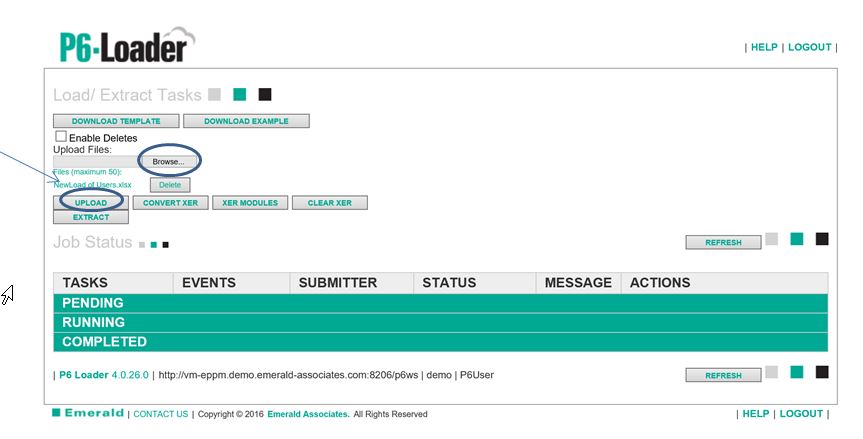
To upload the new information, click ‘Browse’ and select the upload file. Then click ‘Upload’.
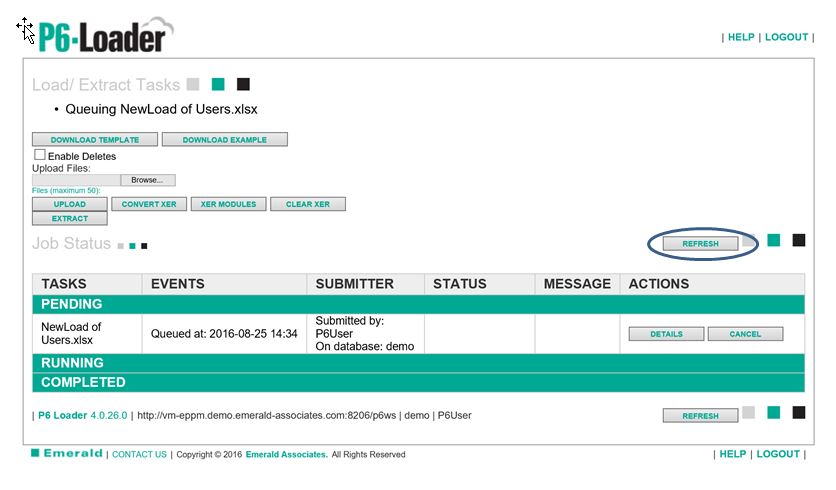
The P6-Loader shows the status of the Upload file. Click ‘Refresh’.
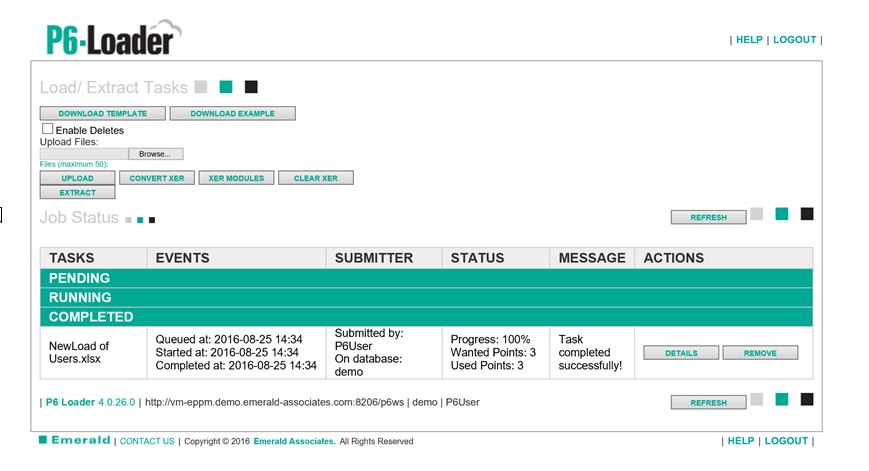
The upload is complete. The new information is in P6.
Our new users have been created in P6 without the user having to visit numerous screens in P6 to complete the task.
The P6-Loader helps streamline a large number of processes, just one of which is creating new P6 Users. Don’t drown in data entry!
About the Author
Mary Lynn Backstrom, PMP, PMI-SP, PMI-BA – Implementation Specialist
Mary Lynn spent many years filling a variety of project controls duties such as planning, scheduling, analyzing, training and continuous improvement in the Aerospace Industry. Since joining Emerald in 2008, she has been a tremendous asset to the Emerald team. She has worked as a lead scheduler for turnarounds, led sessions for review and troubleshooting of scheduling and reporting, created and given custom training courses for clients, and is a sought after Primavera P6 trainer.
Mary Lynn enjoys some very diverse spare time activities. Along with a variety of outdoor activities such as gardening, she also enjoys making life size lawn ornaments for special holidays like Christmas. Mary Lynn is known for her participation in the community as well. You may have seen her walking in fundraisers in Edmonton and Calgary for the Cancer Society.
